Let's play with MQTT!
I've been playing around with MQTT for a while now and despite the extensive documentation of the Tortoise library I made some (noob 😶) mistakes that had me scratching my head for quite a while.
The scope of this article
I'll not describe what MQTT is. There's several good resources online and in book form that does just that.
What I want to do in the article is to show how to:
- install a broker locally
- write a simple subscriber
- write a simple publisher
Installing a broker
There different MQTT brokers to choose between. I'll go with VerneMQ for now, but emqx is another nice alternative. If you don't want to install a broker locally you can also use Cloud MQTT for free.
On a Ubuntu machine it's as easy as downloading a deb package and installing it.
sudo dpkg -i vernemq_<%= latest_version() %>-1_amd64.deb
There's also a Docker image available if you are not runing CentOs or a Debian system.
Start VerneMQ
Once VerneMQ is installed it can be started as a service.
sudo service vernemq start
Configuring the broker
In the interest of simplicity, for this demo we will allow anonymous connections to the broker. Don't leave this on in production. 😉
Open vernemq.conf in your favorite editor and change the allow_anonymous to on
sudo vim /etc/vernemq/vernemq.conf
...
- allow_anonymous = off
+ allow_anonymous = on
...
Adding topics
A central term in MQTT is topics. You add and configure topics in a file called vmq.acl.
For this demo we wil have just one topic with both read and write access. To do this we will just need a single line in the file.
sudo vim /etc/vernemq/vernemq.conf
topic temp
Here we have defined a topic called "temp" and by omitting read and write modifiers it is open for both read and write.
Let's make sure VerneMQ use our new config and setup by restarting the service.
sudo service vernemq restart
Let's code!
The code for this demo is available on my GitLab account. Feel free to clone it if you want to play around yourself. It's a standard mix project created with mix new. I've added the MQTT library Tortoise to make it simple to communicate with the broker.
The subscriber
To subscribe to a topic we will use Tortoise.Supervisor.start_link(). Since we have VerneMQ running locally we will pass localhost as the host and use the default MQTT port 1883. The topic is passed as a tuple containing the name of the topic and an integer representing the quality of service. We will use 0 for qaulaity of service and thus pass the tuple {"temp", 0}.
I've wrapped this in a GenServer so it's easy to spin up several subscribers and prevent us from linking to the iex process.
To start a subscriber in iex run the project with iex -S mix and call start_link like so MqttTest.Subscriber.start_link()
Here's the complete code for the subsriber:
The publisher
Our publisher is also wrapped in a GenServer. It will connect to the broker with Tortoise.Connection.start_link() and publish to the broker with Tortoise.publish().
We connect in the GenServer callback init().
There's a single handle_cast() so we can invoke publish() with a cast.
Sending a message
Now it's time to send a message. We will send a simple payload from one terminal to another.
In terminal 1:
$ cd ~/projects/mqtt_test/
$ iex -S mix
Erlang/OTP 22 [erts-10.4.1] [source] [64-bit] [smp:4:4] [ds:4:4:10] [async-threads:1] [hipe]
Interactive Elixir (1.8.2) - press Ctrl+C to exit (type h() ENTER for help)
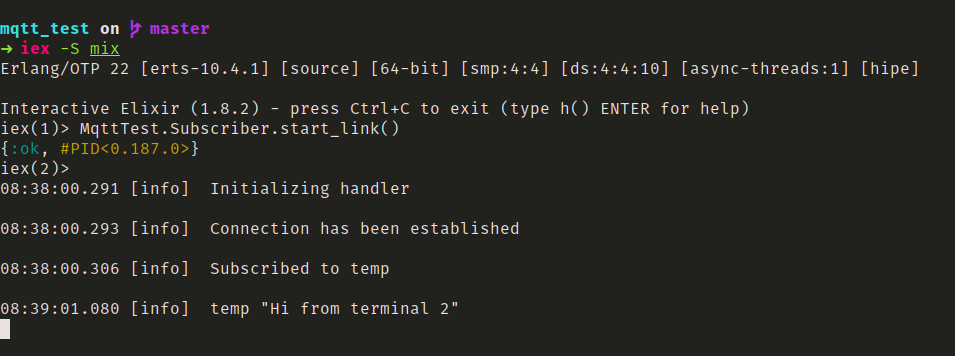
iex(1)> MqttTest.Subscriber.start_link()
{:ok, #PID<0.187.0>}
iex(2)>
20:12:24.132 [info] Initializing handler
20:12:24.147 [info] Connection has been established
20:12:24.201 [info] Subscribed to temp
In terminal 2
$ cd ~/projects/mqtt_test
$ iex -S mix

Erlang/OTP 22 [erts-10.4.1] [source] [64-bit] [smp:4:4] [ds:4:4:10] [async-threads:1] [hipe]

Interactive Elixir (1.8.2) - press Ctrl+C to exit (type h() ENTER for help)
iex(1)> {:ok, pid} = MqttTest.Publisher.start_link()
{:ok, #PID<0.187.0>}

iex(2)> GenServer.cast(pid, {:publish, "Hi from terminal 2"})
:ok
iex(3)>
Back in terminal 1
You should now see a new line in terminal 1
20:15:59.147 [info] temp "Hi from terminal 2"

That's all folks!
That concludes this post. We have published a message to the "temp" topic and a subscriber has received the message. I'll post again later about MQTT with something that's a bit more useful! 👍