MQTT Broker on Digital Ocean
"In the previous episode..."
I wrote a short post on MQTT and VerneMQ some months ago and promised a follow-up. Here it is.
Scope of the post
In this post I'll explain how to set up a VerneMQ server on a Ubuntu virtual machine on DigitalOcean. We will use LetsEncrypt to enable ssl connection and setup users and topics for the VerneMQ server.
Some tools and prerequisites
Mosquitto
When you are setting up a MQTT server (or doing andthing with MQTT really) it's nice to have an easy way to test your setup. Mosquitto is a nice tool to do just that.
Using the command-line tools mosquitto-pub and mosquitto-sub saved me some gray hair. I strongly advise that you download and install it!


You will need a domain
We are going to use LetsEncrypt and certbot to generate ssl certificates. For that you need a domain.
You will also need to add that domain to your DigitalOcean droplet. If you don't have a domain that is already using DigitalOceans name servers ns1.digitalocean.com, ns2.digitalocean.com and ns3.digitalocean.com, you will need to change your domain to used them. Follow the instructions of your domain shop to change DNS. When you have done so it might take up to 48 hours for the change to propagate.
The virtual machine
First we need a machine in the ☁️ for our VerneMQ server. I like DigitalOcean, but you could use any cloud provider. If you use my referal link you will get $50 in credit over 30 days.
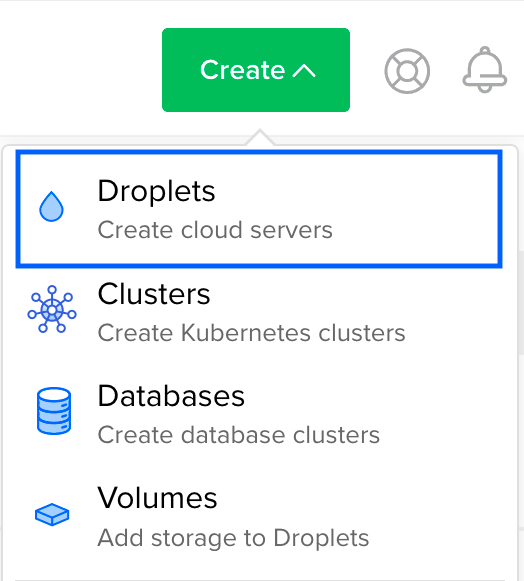
When you have registered a user and signed into DigitalOcean, create a new project and add a droplet (DigitalOcean's name for a cloud server) to it.
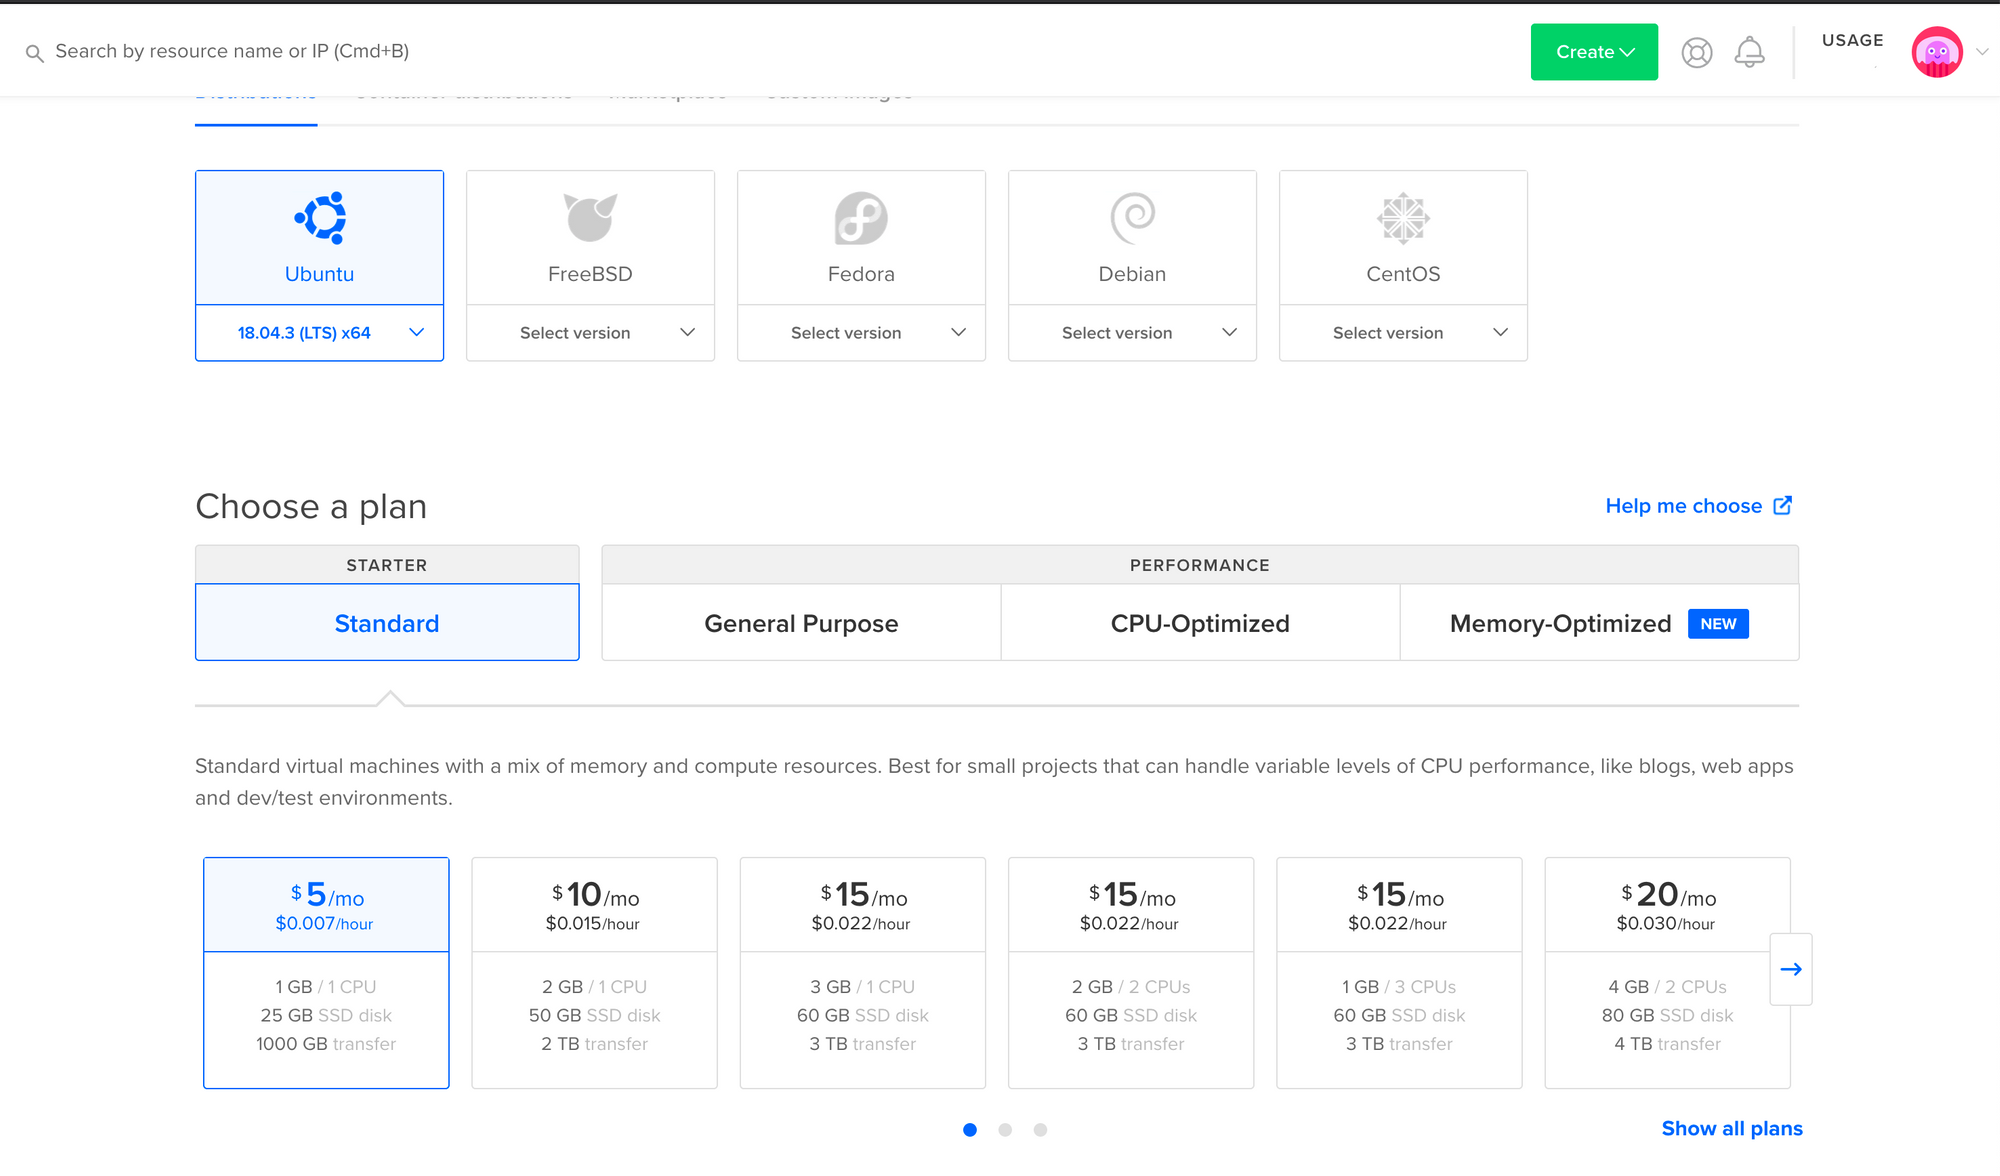
Choose Ubuntu (it's the default), and the most modest spec ($5/month).
Remember to add your SSH key to the droplet. That makes it easy and safe to log into it using SSH.
Logging into the droplet
Once the droplet is created find it in your project. The IP address of the droplet should appear quite clearly on the page of the droplet. Copy it and use it to SSH into it. Again, this requires that you added a SSH key when you created the droplet.
ssh root@<your.drolet.ip.address>
root@your.drolet.ip.address:~#
Installing VerneMQ
I covered installing VerneMQ in my last post, but here's the recap:
Download the file wget https://github.com/vernemq/vernemq/releases/download/1.9.2/vernemq-1.9.2.bionic.x86_64.deb . Depending on when your are reading this, that might not be the most up-to-date version. You can find all versions of VerneMQ on https://vernemq.com/downloads/.
The installation guide for VerneMQ is very nice. I'll just recap it here.
Once the file is downloaded you can install by running dpkg install vernemq-1.9.2.bionic.x86_64.deb.
Verfy the installation
Next, run dpkg -s vernemq | grep Status.
If VerneMQ has been installed successfully Status: install ok installed is returned.
Start VerneMQ
Once you've installed VerneMQ, start it on your node:
service vernemq start
SSL, please
I wanted to use a secure connection to the VerneMQ server. LetsEncrypt and certbot to the rescue! 🤖
Install Certbot
First install certbot on the droplet. Assuming you chose Ubuntu just follow the instructions on the certbot hompage.
Generate a certificate
When certbot is installed we can generate a certificate. That can be done with the following command: sudo certbot certonly --standalone
You will be guided through som steps, including providing the domain for the certificate. This domain should be the one you intend to use for the droplet and MQTT server.
Move the certificates
I read a post about another guy setting up VerneMQ with SSL. He recommended moving the cert and key to /etc/vernemq/ and changing the owner to vernemq. This might not be needed, but I don't think there is any harm in it and you avoid having to give read rights to your letsencrypt folder.
You can do it with the following commands:
cp /etc/letsencrypt/live/your.domain.name/*.pem /etc/vernemq/
chown vernemq:vernemq /etc/vernemq/*.pem
Configure VerneMq
Now we need to add some listeners so VerneMQ knows it should expect requests through ssl, and on other ports. We also need to point to the cert file, key file and ca file for SSL to work. I added/edited the following lines in /etc/vernemq/vernemq.conf. Note the line numbers may differ in your vernemq.conf
237 listener.tcp.local = 127.0.0.1:1883
238 listener.tcp.default = <droplet_ip>:1883
239 listener.ssl.default = <droplet_ip>:8883
285 listener.http.local = 127.0.0.1:8888
286 listener.http.default = <droplet_ip>:8888
335 listener.https.certfile = /etc/vernemq/cert.pem
356 listener.vmqs.keyfile = /etc/vernemq/privkey.pem
363 listener.https.keyfile = /etc/vernemq/privkey.pem
Add users
I also wanted to restrict read and write access to VerneMQ to specific users. This is easily done by using the vmq-passwd command-line tool and/or editing /etc/vernemq/vmq.passwd file.
I ended up writing the user names and passwords in my favorite editor and pasting it all into vmq.passwd before running vmq-passwd -U /etc/vernemq/vmq.passwd to encrypt the passwords in the file. There should be one username and password per line, separated by a : .
user1:password1
user2:password2
vmq-passwd -U /etc/vernemq/vmq.passwd
Please make sure that your usernames and passwords does not contain any : 's. Also, make sure that you don't have any trailing spaces. I spent way to much time on this step... 🙄
Add topics
Now it's time to add the MQTT topics that you will publish and subscribe to. That's done by editing the /etc/vernemq/vmq.acl file. Again, the official VerneMQ documentation explains this quite nicely.
TLDR;
You can grant read and/or write to anonymous users and/or named users. I added a subscriber user and a publisher user.
user subscriber
topic read topicname1/#
topic read anothertopic/#

user publisher
topic write topicname1/#
topic write anothertopic/#
☠️☠️☠️ Trailing spaces will be part of the topic name ☠️☠️☠️
Restart VerneMQ
To make sure that all of these changes takes effect please restart VerneMQ
vernemq restart
Test with mosquitto
Assuming you did install mosquitto, you can now try to subscribe to one of your topics.
In terminal 1mosquitto_sub -h <yourdomian.com> -u <verne-mq-user> -p 8883 -t <your-topic> -P <user-password> --cafile /etc/ssl/certs/cacert.pem
and publish to it in terminal 2 mosquitto_pub -h <yourdomian.com> -u <verne-mq-user> -P <user-password> -p 8883 -t <your-topic> -m "HI!" --cafile /etc/ssl/certs/cacert.pem
If you are on Linux you can use the --capath /etc/ssl/certs option instead. For people on Mac: you either have to export the root certificates from the Keychain tool or download them.
If everything works you should see the message "HI!" in terminal 1. 🎉🎉🎉
Now write code!
Hopefully you are all setup to write som acctual code that leverages MQTT. I recommend you write that code in Elixir, using the Tortoise MQTT library 😀
Until next time 🤙